Search Engine

Custom Search

Tuesday, December 30, 2008

True Love


True Love Papers and True Love Elements.
So I want to know what you think. We don't own 12x12 printers, but this is layed out in that size. The 2 background papers are 12x12. The scalloped edges are the actual size on the layout, except the green which I enlarged to compare the picture quality. Some of the greatest looking papers are heavy in memory up to 10mb for one paper. If I cut the size to 6x6 or 8x8, I think you would be just fine because the largest you print is 8 1/2 x 11 anyway. Either way is good for me.

Monday, December 22, 2008

Merry Christmas


Old Lower Case Alpha. Thank you for all the nice comments and Merry Christmas to you and your family.

Friday, December 19, 2008

Blue and Gold


Blue and Gold

Thursday, December 18, 2008

Christmas Dreams


Christmas Dream Cleaning out my computer, lets see what comes of it!

Wednesday, December 17, 2008

Tied Up Papers and Elements

Tied Up Papers and Tied Up Elements. Now to use the "tape" pieces, in that layer select a drop shadow that is low or soft edge. Then change the layer from normal to hue. This will achieve the look in the layout. They don't look this way in the download. You can also change the color by picking what you want to use, select the paint bucket and over the tape, add the color. Play around a bit and see if you find something that you like better.

Tuesday, December 16, 2008

Nashville Bound Elements

I split up these downloads, so all the Music, Amp, Guitars, mike, etc. The mesh, brads, buttons, stitches, frame, etc. and musical border (except the beige) are in the links below. (In case you would like them for something else, and to be kind to our friends with dial-up.)
  1. The Beige Elements.
  2. The Blue Elements.
  3. The Green Elements.
  4. The Red Elements.

Monday, December 15, 2008

Nashville Bound Papers #2

Nashville Bound Papers #1. Thank you for taking the time to leave the kind comments. I'm glad you are able to use the kits.

Saturday, December 13, 2008

Nashvville Bound Papers #1


Nashville Bound Papers #1. Amy asked for a Music Scrapbook Kit to do photo's for her friend.

Friday, December 12, 2008

Snowboarding Elements #3.


Snowboarding Elements #3. The Arrow is not in the elements, it is a reminder to teach the kids about the cookie cutter.
  1. Open a new document and fill it with color. (If you are trying to match a color in a kit, select the eyedropper and click over the color you want.) or you can...
  2. Open any paper you wish to use.
  3. Select your cookie cutter tool.
  4. In the top, click the drop down menu and select the shape you want to cut. I choose an arrow for the example.
  5. Start dragging over the paper and the shape will appear. By holding down the shift key, the proportions will be contrained, otherwise you will have a free formed shape. (You can also reshape it after it is cut.)
  6. You can also hold the space bar and move your shape around, if you are trying to center a pattern in the shape. (I know you are a perfectionist Jack).
  7. When you let go of the mouse the shape will be cut.
  8. Don't like it? Click Edit/Undo and try again. (When you close the paper, don't save the changes.)
  9. When you are happy, add anything else, staples, burn toool, etc or you can do it later. Then drag it into your layout.

Thursday, December 11, 2008

Snowboarding Papers #2


Snowboarding Papers #2. And the last of the elements tomorrow.

Red Grunge Alpha

Red Grunge Alpha. And this one I cut apart, I wanted to teach my kids how to use the tool.

Wednesday, December 10, 2008

White Grunge Alpha


White Grunge Alpha. And THANKYOU for the nice comments.

Black Grunge Alpha

Black Grunge Alpha.
  1. So we are going to learn how to use the Rectangular Marquee Tool. These alpha's are in one sheet.
  2. Open the alpha. (not the preview).
  3. Select the Rectangular Marquee Tool, on the left, looks like a square with dotted lines.
  4. This will cut out the letter you want.
  5. Position it on the top left of the letter and drag it until the entire letter is in the box. Now select Edit>Cut
  6. Now select your layout.
  7. Select Edit>Paste. (it should be in a new layer)
  8. If you want more than 1 of any letter, on that letter (in the layers palette on your right) select the layer.
  9. At the top select Layer>Duplicate Layer. (you now have 2 a's, t's etc.) and form your word.
  10. If you really hate doing this, I'll make them in separate files for you. Let me know.

Tuesday, December 9, 2008

Snowboarding Elements #2


Snowboarding Elements #2. I forgot to write it on the preview, but the Action on the Arrows is by Atomiccupcake.

Monday, December 8, 2008

Snowboarding Elements #1


Snowboarding Elements #1.

Sunday, December 7, 2008

Snowboarder Papers #1

Leah asked for a snowboarding kit in her husbands colors. I added the yellow because I thought the burgandy and greys needed some contrast. I don't snowboard, so it was lots of fun to try something new. I hope you can use these Leah for your photo's. Snowboarding Papers #1.

Saturday, December 6, 2008

Art Class Canvas Papers


Art Class Canvas Papers.

Friday, December 5, 2008

Art Class Papers #3


Art Class Papers #3.

Wednesday, December 3, 2008

Art Class Papers #2


Art Class Papers #2. And thanks for the nice comments.

Art Class Papers #1


 Art Class Papers #1. I like to have lots of choices, so I like a lot of paper. Your welcome to what you want to use.

Tuesday, December 2, 2008

Art Class


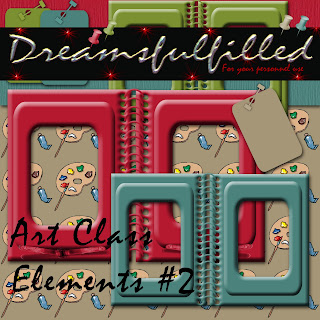
Art Class Elements #1. The spiral notebook would be good to either put a photo on or do your journaling.

Sunday, November 30, 2008

Candy Land Alpha


Candyland Alpha

Friday, November 28, 2008

Hiking Elements


Hiking Elements. Thank you for all the kind comments, it is very nice to be appreciated.

Wednesday, November 26, 2008

Cowboy's Life


Cowboy's Life Paper 1, Paper 2, Element 1, Element 2 and Cowboy's Life Elements #3.
  • To use an odd shaped frame.
  • First, duplicate the frame.
  • Than on the first layer, fill the interior with your paint bucket.
  • Drag your photo in and postion above the first layer.
  • CRTL+g or Layer>group with previous
  • The second layer is the frame.
  • It should work with most odd shapes and you won't have to do all that erasing. If you have a fancy frame only paint the inside. Don't worry if something has gone wrong. Start over.

Monday, November 24, 2008

Alpha

Blue Lower Case Alpha.

Saturday, November 22, 2008

Winter Wonderland Elements #2


 Winter Wonderland Elements #2.

Friday, November 21, 2008

Winter Wonderland Elements #1


Winter Wonderland Elements #1.
  1. p.s Kara, I have your western stuff almost done, I'll get it loaded next week.

Thursday, November 20, 2008

Snowmen and Outer Wear


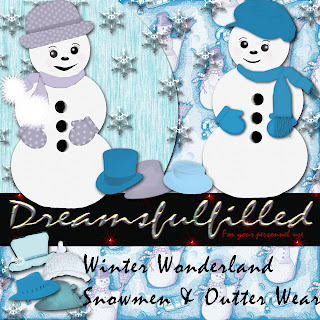
 Snowman and Boys Outer Wear and Snowman and Girls Outer Wear. One snowman shown is in each download. You have to dress them. The hats and scarf's are all separate, so you could make them different. Open the snowman, add the mittens, then add the scarf, IMPORTANT, you must add the shadow to the boy's scarf now. Click Layer>merge visible and drag into your layout. I'll load the template for these and add it at this post (they looked so cute in Red.) I had to make a brush to make fur, so Dad thought I should make then parka's, if he makes them, I'll load it.
Ok, here's the template, in case your little one is wearing green or red or ?
 Snowman Template.
  1. I have named all the layers.
  2. Select which pair of eyes that you would like.
  3. On your mittens, select if you want snowflakes or not. Add the color you want.
  4. Pick your scarf. On the scarf with finge you may have to add the drop shadow (I can't remember if I did this in the template)
  5. Pick a hat. And add the color you want
  6. On every layer you want, you should see a little eye. All other layers the "eye" will be off.
  7. If you want to use paper, click on the layer, drag in the paper, CTRL+g, or Layer>group with previous.
  8. When you are finished click Layer> Merge Layers and it's ready to drag into your layout.

Wednesday, November 19, 2008

Winter Wonderland Chipboard Frames


 If you put the tabs on, we can get the download into one. See the Chipboard Frames for ideas.
Drag the tab into the layout. Layer the Frame over it. If you want more than one, duplicate the layer(s) and lay them out, when your finished, lock the layers together (click on the first layer and in each layer you want locked together, click in the empty box, you'll see a lock) and click>layer>merge linked. Now you can move your frame around and it will stay "together".

Tuesday, November 18, 2008

Monday, November 17, 2008

Winter Wonderland Papers #1


Winter Wonderland Papers #1. And thanks for the nice comments, I'm glad that you can use the kits. Also, I changed the web address for A work in progress, she is now selling her kits, which is good for her, but I wanted only to add links where you could get free kits to use.

Saturday, November 15, 2008

Candy Land Elements #2


My grandson stayed here on Tuesday and he wanted to make a gingerbread house. This is the house he made. I added the little gift boxes, they are all square but if you change the proportions you can get different boxes. As 100 percent by 150, or 200 to 100. To do this start dragging a corner and at the top a the dimensions will appear, if you just want it larger, lock the size. Otherwise play a little.
The ribbon slide is a bit tricky to erase sometimes, and look right. So try this. Drag the ribbon end up to the slit were it goes under and just let the rest hand over the edge. It will be discarded when you finish your layout and flatten the image. Repeat for the other side and it's attached.
Tip 3...you can Type or use your brushes on brad, or little candies, or ?, to personalize them. And putting a brad on the top of your paperclip changes the look.

Friday, November 14, 2008

Thursday, November 13, 2008

Folded Edge Template


 Folded Edge Template. In 3 layers, CRTL+g. Remember the colors should coordinate to look good. If you want the fold in another corner, than click Image>Rotate>(select which command locates it properly, left, right, etc.).

Candy Land Elements #1


Thanks again for all your kind comments.
If you want your paper clips to appear "attached", place it behind or above the layer you want it attached to (depending on the look you want).
Select your eraser tool (on the left), and on the top of the screen I chose block, to get a square eraser. Now erase the part of the image would not be shown if it were actually attached. I did it both ways for you to see in this layout.
Remember, you can always select Edit>undo, or if it really goes badly, throw away the layer, and drag the clip back in and start over.

Wednesday, November 12, 2008

Monday, November 10, 2008

Chipboard Frames

These will go with one of the Christmas sets I'm putting together. So each one has the frames with the tabs in different locations, and one plain and one tab. There are 4 different kinds of ties. If you mix and match, it'll probably comes out to hundreds of chooses. I didn't do the math, but you can.

Saturday, November 8, 2008

Border Templates #2


Border Templates #2.

Border Templates #1


Border Templates #1.

Friday, November 7, 2008

Tool Time Papers#2


Tool Time Papers #2.

Thursday, November 6, 2008

Border and Page Templates #3


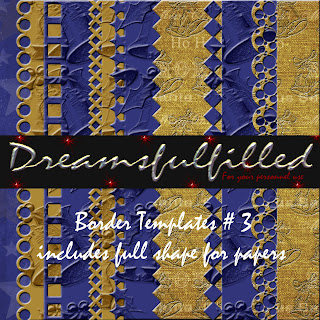
Border Templates #3. Drag the template into your layout. Place the paper above it in the layer palette (on the right) and CRTL+g.
There are 21 templates in this download, each design in 3 sizes.
Jack, I am working on a Journaling stamp set for you. If you have something in mind, email your ideas, thoughts, drawings, etc. This is going to be awhile before it's finished.

Wednesday, November 5, 2008

Square Frame Template from October Fest


Square Frame Template, this is the template that I made for the frame from October Fest. If you can't remember how to use a template, click here. Just the template. But I thought that some of you would like a different color, and this will take less than 2 minutes to use. In the preview, I was playing around with the preview from the kit, just to show you that your imagination is the only limit. Oh, and after I merged the visible layer, I resized the square into a regular frame.
Open the template.
Open the paper or papers you want to use.
Click on the first piece of the template, and than click on your paper and drag it over the template. It should be over the first layer. If not, pull it into position. And do this for each layer. IF something doesn't go right. Position the paper and click, CTRL+g. Each layer has the bevel already.
I put the staples in one layer for you. If you want to change the color or?, on the right side (above your layers) click layer style and pick one you like. When you like it, click at top, Layer>Merge Visible. Now you can drag it into your layout and resize. When closing the original file, DON'T SAVE CHANGES (unless you want to.)

Tuesday, November 4, 2008

Tool Time Elements


Tool Time Elements. And thank you all for the nice comments. And you are very welcome.

Monday, November 3, 2008

Tool Time


Tool Time Papers. Our grandson was here last weekend and he's started building an airplane. He told me, he hit his thumb with the hammer twice, but grandpa only saw it once. 

Saturday, November 1, 2008

Deep Blue Alpha


 Deep Blue Alpha.

Green Lower Case Alpha


Some folks like these and I thought they might go with this Birthday Kit. Green Lower Case Alpha.

Friday, October 31, 2008

Birthday Party

Birthday Party Papers and Birthday Party Elements.

Thursday, October 30, 2008

Report a Broken Link or Message

ALL THE LINKS ARE INOPERABLE.  IF I EVER RECOVER THE FILES, I WILL RELOAD THEM.

I am so sorry that I can not repair any of the broken links.  I stored the kits on an external hard drive which has failed.  I do not have any of the kits to reload them.  I haven't found an affordable way to even try to recover them.  All the links have expired.


Black Lower Case Alpha


Another Alpha I thought would go well with Boo. If you click on Alphas in the freebies labels, you could also use the orange color. Black Alpha.