Search Engine

Custom Search

Saturday, September 26, 2009

Autumn Hues


Hello Red Shoes, I'm glad to see your still scrapbooking.

Wednesday, September 23, 2009

Bus Template


Bus Template. I was thinking that there could be some other uses for this. It is just the Template.
  1. You add the color (or ?) in one layer.
  2. Click on the Text Layer, highlight the type, pick the color you want, and retype your phrase.
  3. IMPORTANT!! You must decide which direction you want the bus in your layout. If you would like it turned. Click Image& Rotate& Flip layer horizontal. Than add your text, in a new layer. You can't rotate text.
  4. When you are finished click Layer& merge visible. And drag into your layout. Have Fun.

Tuesday, September 22, 2009

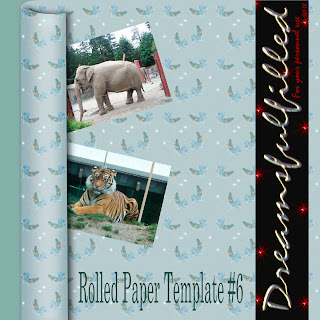
Rolled Paper Template #6


Rolled Paper Template #6. This is a 2 layer template, so that you can "tuck" anything under the edge. Open the template.
  1. Fill the mark layers with color or paper. If you are filling with paper click on the background layer and then drag the paper into the template. Click on the empty layer above it, you will see the setting (I think it was hard light). On the paper that you dragged in change the setting.
  2. Click on the layer marked fill with color directly above the background layer, and now drag your photo's or ? into the template. Position and size, add a drop shadow.
  3. Now click Layer>merge visible. And you can drag it into your layout. Have fun.
P.S. I know the animals and tooth fairies don't go together, I am still painting.

Monday, September 21, 2009

Plan Ahead


Plan Ahead.
There is no text on the bottle or paste elements, so that you can personalize them with what you'd like. Remember in order to fit the text on the bottle as I did, type in short lines to re size into the space. Or each word in a separate layer. After you do it a few times it'll become easier to determine how many words in each line you need.

Friday, September 18, 2009

Neutral Paper


Neutral Paper.
I thought that some of you might like some Neutral Papers. I check the Wild Side Elements and they seemed to work alright, and also the School Days paper. Thanks for inviting me to see the card that you made, lovely (I tried to leave a note, my German? is poor). I read Dutch a little better. Off to buy more paint for the house.

Thursday, September 17, 2009

Monday, September 14, 2009

Page Border 2


  1. Page Borders 2. All the files are in Black or White.
  2. Remember that you can add paper or color or a gradient by making a new layer and crtl>g.
  3. If you are creating a 2 page layout try erasing one side and dragging it into your second page. Select image>flip LAYER horizontally. You will want to click View>grid and line up both pages to the same grid mark. You will have a border that links the two pages together, rather than seemingly separating them.
  4. Have fun.