
Search Engine

Custom Search
Showing posts with label Template. Show all posts
Showing posts with label Template. Show all posts
Friday, March 18, 2011
Borders #5
Monday, February 28, 2011
Borders

Monday, January 3, 2011
Frame Template #9

Thursday, October 14, 2010
Road sign Templates

Also I renewed our account today, so we have another year of storage. Have fun.
Thursday, September 9, 2010
File Tab Template

File Tab Template. It was originally set up as a .psd file, however it would have loaded at 107 mb. To make the download smaller, it is loaded in 3 .png files and is about 30 mb.
- Open a 12 x 12 new document and drag all 3 files into the new document.
- As I have been teaching here, add a new layer to add a color and crtl +g.
- Set the layer to overlay, or play around with the settings until you are happy with the results.
- OR click on the layer you would like to be filled with paper and drag a paper you like in, crtl+g.
- If you would like, you may duplicate the layers and move extra "tabs" into your layout. Only the top layer will be seen in it's entirety, so with your move tool selected, rotate the layers slightly askew until you have the desired effect.
- Merge the layers.
Tuesday, July 13, 2010
Notebook Edge Templates

Thursday, October 1, 2009
Stitched Scalloped Template
 Stitched Scalloped Template. reloaded 4-16-11
- Open the template, drag in your paper, or make a new layer to add color, Ctrl+g (Layer>group with previous).
- In the preview, I have set one to Overlay and the other to multiply. Pick the layer style that you looks best .
- Layer>merge visible. Have fun.
Wednesday, September 23, 2009
Bus Template

Bus Template. I was thinking that there could be some other uses for this. It is just the Template.
- You add the color (or ?) in one layer.
- Click on the Text Layer, highlight the type, pick the color you want, and retype your phrase.
- IMPORTANT!! You must decide which direction you want the bus in your layout. If you would like it turned. Click Image& Rotate& Flip layer horizontal. Than add your text, in a new layer. You can't rotate text.
- When you are finished click Layer& merge visible. And drag into your layout. Have Fun.
Tuesday, September 22, 2009
Rolled Paper Template #6

Rolled Paper Template #6. This is a 2 layer template, so that you can "tuck" anything under the edge. Open the template.
- Fill the mark layers with color or paper. If you are filling with paper click on the background layer and then drag the paper into the template. Click on the empty layer above it, you will see the setting (I think it was hard light). On the paper that you dragged in change the setting.
- Click on the layer marked fill with color directly above the background layer, and now drag your photo's or ? into the template. Position and size, add a drop shadow.
- Now click Layer>merge visible. And you can drag it into your layout. Have fun.
Sunday, August 2, 2009

Wednesday, July 22, 2009
Turn Template #4
 Turn Template #4. There are 2 templates included.
 - The first is the larger image shown, for all one color of paper. Open the template and drag in a paper, CTRL+g. Set the layer to Hard light (or play with these and see if you like something else better.) When you have finished click Layer, merge visible.
- The second is a .psd file, it has the 2 layers separate (the smaller image shown), so that you can create "double sided paper". Open the template, and fill with color or paper. When you are finished click Layer, merge visible. Have Fun.
Tuesday, May 12, 2009
Four Wheeler Template
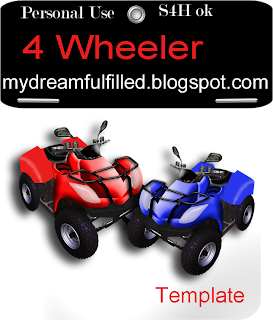 Four Wheeler Template. And the Helmet Template. There are 3 places to fill with color. Click Layer> merge visable and drag into your layout. Have fun.
Thanks for all the nice comments.
Friday, May 8, 2009
Cube Frame

Cube Frame. Use it for photo's, text or as an embellishment. Open the template...
- Click on the layer you wish to use, and drag in a photo or... it should be grouped with that layer of the template. If not Click ctrl+g, OR Layer>group with previous.
- When you are finished with all 3 sides, click Layer>merge visible. Drag into your layout and resize.
- TIP: angle your photo similar to the angle of the box. Have fun.
Friday, April 17, 2009
1962 Impala and Template

1962 Impala and Template. My hubby wanted a 2 tone template to help him decide what color to paint his car. I included the 2 cars shown, put the same color in both layers for a car, like the red, or different in each layer for the 2 tone effect of the Beige. I haven't tried this yet, but I'm pretty sure the Jackson is going to love playing with this, because it kept dad busy for an hour.
Monday, March 30, 2009
Date Template

Date Template. I know it looks white, but it is clear. All you have to do is,
- Move both arrows to the month and year.
- Move the star to the date.
- The little gears, were dad's idea. If you don't want them, click the little eye off in the gears layer.
- Click Layer, merge visible and drag into your layout.
Wednesday, March 18, 2009
File Folder Template
 File Folder Template. You can add the color or paper you would like. It is loaded as a template, so that you can add a photo's as shown.
 - Place the photo's above the front layer and crtl+g.
When you are finished click Layer>merge visible layers and drag into your layout.
Monday, March 2, 2009
Rolled Paper #3

Paper Template #3. Shown twice, pulled farther into corner. Your comments are really appreciated, thanks.
Friday, February 20, 2009
Rolled Paper Template

Rolled Paper Template. Open the template. Drag the paper you want, set the paper layer to Overlay.
Jeep and Template
 Jeep and Template. Thanks for the comments, it's encouraging. The tip about the saving files in TIFF, has sure come in handy on my computer. Although the files are larger in size than .psd, a preview isn't needed, so finding things had gotten a whole lot easier. Thanks!
 Wednesday, February 18, 2009
Snowmobile and Template
 Snowmobiles and Template. From the conversation about the fair also reminded me of this template idea. It's 1 template, in the preview I used it twice to form the curve in the center, if you rotate the template the curve could go the other way, just in case you want a 2 page layout. Curved Template.
Subscribe to:
Posts (Atom)