 I made these scalloped templates and they further your digital scrapbooking. You can use any paper that you download on these shapes. Open your project and drag the template into it. Just positon it below the paper you wish to use and CRTL+g (or layer>group with previous) and you have the shape. You may add drop shadows or bevels, whatever you would like at this time. Download the Scalloped Edge Templates here. Also I added a custom search engine, just above the Dreamsfulfilled title, it is suppose to be geared towards free digital scrapbook kits.
Search Engine

Custom Search
Wednesday, September 3, 2008
Scalloped Templates
I made these scalloped templates and they further your digital scrapbooking. You can use any paper that you download on these shapes. Open your project and drag the template into it. Just positon it below the paper you wish to use and CRTL+g (or layer>group with previous) and you have the shape. You may add drop shadows or bevels, whatever you would like at this time. Download the Scalloped Edge Templates here. Also I added a custom search engine, just above the Dreamsfulfilled title, it is suppose to be geared towards free digital scrapbook kits.
Harvest Papers #4

I have put together the lesson on templates again and some scalloped templates and edges that I made and it will be the next post. But I didn't want my coments to interfer with the instructions to use them. It's really easy and you will find that it opens a whole new element to the papers that you download. It's not always easy to find what you want, (especially for free). So if you take the time to learn this one step, even if you never use the Templates gals make for an entire layout, you will be glad you did. I plan to add a list of links, of other sites with free digital scrapbook kits. As always as I have time. So here is Harvest Papers #4.
Monday, September 1, 2008
Harvest Embellishments #3
 So I started looking through my files, and think that I can put together some Halloween things together. So we'll start on that next. And we'll keep working on the lessons, so that it'll make it easier to put together the pages that you want in shorter periods of time. And I put together another Element set. So if you would like these download the Harvest Embellishment #3 here. I really think these would make good heritage papers and would be just fine for girls also.
Harvest Embellishments #2
 So here's some more of the embellishments that match the Harvest Papers. Harvest Embellishments #2 here.
Wednesday, August 27, 2008
Harvest Papers #3
 And here are another set of Harvest Papers. Now the Photoshop lessons are going to move on to using the templates because you can do so much more with all your papers. It's not hard. If something doesn't seem quite clear in any of the previous lessons, than leave a note and I'll try to include it. As always as I have time. You can download the Harvest Papers #3
Harvest Alpha
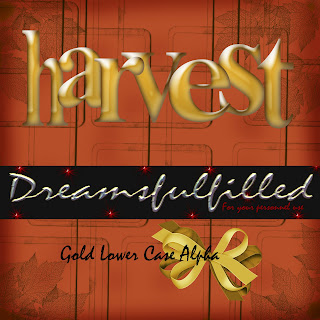 Here is an alphabet that I thought would go well with the Harvest Papers. Harvest Alpha's here, all lower case. And it's my youngest birthday and probably old enough that, that shouldn't be revealed, so HAPPY BIRTHDAY BABY.
Photoshop Lesson 3
1. You can now drag and embellishment into you layout, and resize and move where you would like it to be placed.
2. If you find that you would like something behind another layer, in your layers palette, drag the element below layer you want above.
3. Or you can drag, in the layers palette on the right, one up.
4. Now is when I would usually add any text. Click on your text tool, on the left, and place the cursor approximately where you would like your text. Select a color and font. Start typing.
5. When you are finished, select your move tool, and place it exactly in place.
6. IT IS IMPORTANT, that you flatten the image, before you print. In the layers, at the top, select layer>flatten image. This will discard any information under the layer above it and make printing much quicker.
7. Before, I print, I usually save the file and close it. Than drag it back into Photoshop, because although this seems like an extra step, if it asks to assign RGB color, than select ASSIGN RGB color. This will assure that your print quality.
Subscribe to:
Posts (Atom)